v3 Save Image

Saving the result

To save an image, click the Save button at the top of the control panel. You can then choose the name and file type you would like to save as.

If you want to return to the editing process later and reload your image and continue adjusting the sliders, you will need to save a Session file. In LandscapePro 3 this is a .lp3 file. This saves the original image, all of the area selections, and all of the sliders values. These .lp3 files can only be opened in LandscapePro 3.

Tip: If you are using LandscapePro as a plug-in the save button will be replaced with a Save and Close button. Clicking this will save your edits and return you to Lightroom or Photoshop. Note that Session files cannot be created from within the plug-in.

Plug-in Mode

Using the LandscapePro Plug-in

Studio & Studio Max Editions Only

The Studio edition of LandscapePro can enter a “plug-in mode”. This is intended for use when LandscapePro has been launched by another application (such as Photoshop) to enhance an image that is being managed by the other application. LandscapePro then behaves like a plug-in to the other application.

After the plug-in has been successfully installed as outlined in the Plug-in Installation Guide, you will be able to use LandscapePro as a plug-in in any of the supported photo editing applications.

When LandscapePro is run as a plug-in from another application, the image or layer in the other application will automatically be loaded into LandscapePro where you can enhance the image in the usual way. Once you are happy with your results, press the Save and Close button on the toolbar. This will close LandscapePro and return the enhanced image to the original application.

Using LandscapePro from Photoshop

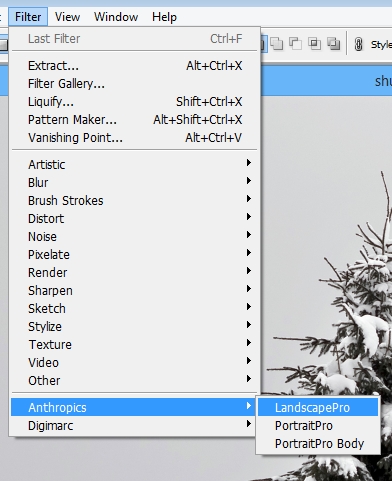
When the plug-in has been installed, LandscapePro will appear as a filter in Photoshop. In the Photoshop Filter menu, you will find a sub-menu called Anthropics, and in that you will find LandscapePro.

The LandscapePro filter works like other Photoshop filters in that it is applied to the current selection (or the whole area if there is no selection) on the current layer. When you select the filter, the image being filtered will automatically be opened in LandscapePro.

Plug-in Location: Filter> Anthropics> LandscapePro

v3 Plug-in Mode

Using the LandscapePro Plug-in

Studio & Studio Max Editions Only

The Studio edition of LandscapePro can enter a “plug-in mode”. This is intended for use when LandscapePro has been launched by another application (such as Photoshop) to enhance an image that is being managed by the other application. LandscapePro then behaves like a plug-in to the other application.

After the plug-in has been successfully installed as outlined in the Plug-in Installation Guide, you will be able to use LandscapePro as a plug-in in any of the supported photo editing applications.

When LandscapePro is run as a plug-in from another application, the image or layer in the other application will automatically be loaded into LandscapePro where you can enhance the image in the usual way. Once you are happy with your results, press the Save and Close button on the toolbar. This will close LandscapePro and return the enhanced image to the original application.

Using LandscapePro from Photoshop

When the plug-in has been installed, LandscapePro will appear as a filter in Photoshop. In the Photoshop Filter menu, you will find a sub-menu called Anthropics, and in that you will find LandscapePro.

The LandscapePro filter works like other Photoshop filters in that it is applied to the current selection (or the whole area if there is no selection) on the current layer. When you select the filter, the image being filtered will automatically be opened in LandscapePro.

LandscapePro 3 can be used as a Smart Filter by applying it to a Photoshop Smart Object.

Plug-in Location: Filter> Anthropics> LandscapePro

Enhance Image

After you have opened an image and the areas have been identified, the horizon has been adjusted if required, then you are ready to start enhancing the image.

Viewing the result

You can always flip the enhanced (“after”) image back to the original (“before”) image to see the changes by pressing and holding the Enter key, or by pressing the Original button at the top of the controls panel.

Important things to check

You can always go back to the Add & Edit Areas by clicking on the section again.

Changing the result

When you first begin editing, there are no adjustments made to your image.

You can change how the image is enhanced by moving the sliders in each section on the Side panel.

The sliders are grouped into sections that control various aspects of the image. When you first enter this stage, all sections are closed. Sections can be opened or closed by clicking on their title button.

In every section there are a set of presets which will set some or all of the sliders to pre-defined values to get a particular effect. You can go through these to see some of the types of enhancement possible for your photo.
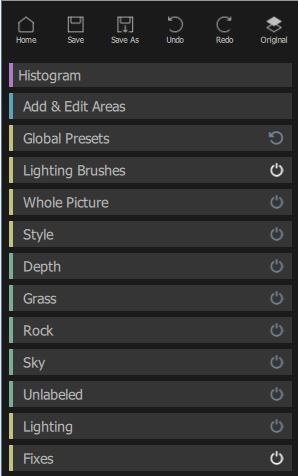
Controls panel

Some or all of the labels will appear in the controls panel, depending on what areas have been added in the identifying areas process.

Saving the result

The Save button at the top of the control panel lets you save the image and choose the name and file type to save it as.

If you would like to save all the settings so that you can reload your image and continue adjusting the sliders, select to save the image as a .lp2 image. This saves the original image, all the area selections, and all the sliders values into a proprietary “.lp2” file.
v3 Enhance Image

After you have opened and labeled your image, you are ready to start editing.

Viewing the result

You can always flip the enhanced (“after”) image back to the original (“before”) image to see the changes by pressing and holding the Enter key, or by pressing the Original button at the top of the controls panel.

Tip: You can always go back and adjust the selection by clicking on the Add & Edit Areas header again. No Continue button will be displayed this time, you can simply click on another section to continue editing. 

Changing the result

When you first begin editing, there are no adjustments made to your image.

You can change how the image is enhanced by moving the sliders in each section on the Side Panel.

The sliders are grouped into sections that control various aspects of the image. Some or all of the labels will appear in the Side Panel, depending on what areas have been added in the identifying areas process.

When you first enter this stage, all sections are closed. Sections can be opened or closed by clicking on their title button.

In every section there are a set of presets which will set some or all of the sliders to pre-defined values to get a particular effect. You can go through these to see some of the types of enhancement possible for your photo.

Saving the result

The Save button at the top of the control panel lets you save the image and choose the name and file type to save it as.

Add & Edit Areas

Adding Areas

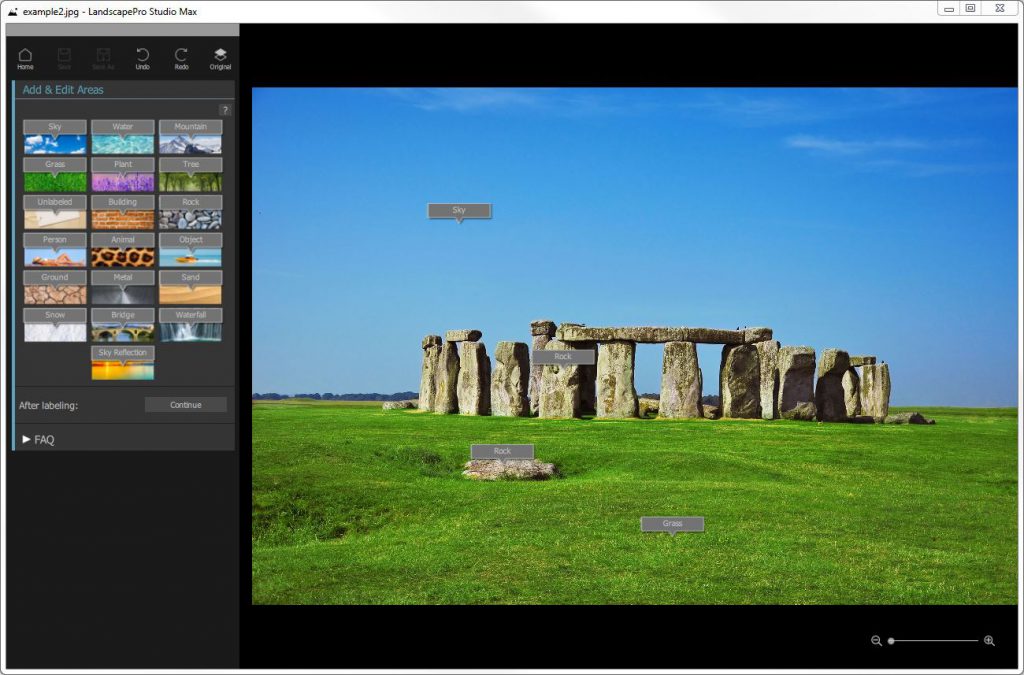
After opening an image you can label different areas of the image such as Sky and Rock by dragging the labels from the left hand side of the screen onto the image.

Editing Areas

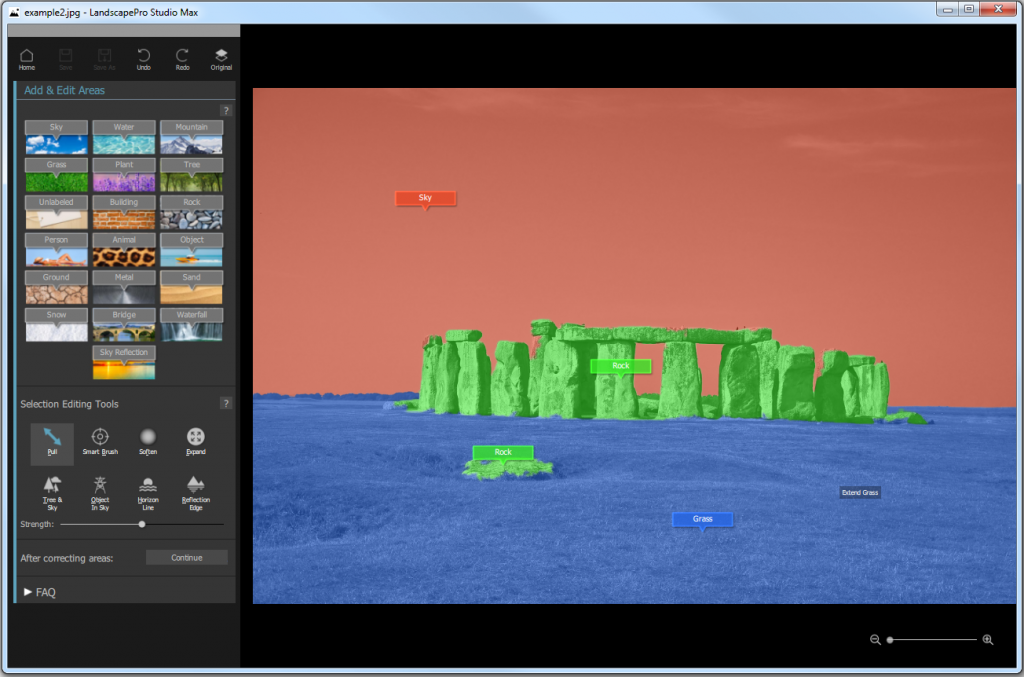
When you have finished labeling areas, press continue and the areas you have chosen will be expanded automatically and highlighted in different colors. These areas can be edited by clicking the mouse and dragging the regions. Try it to see how this works. You don’t need to be too accurate, and you can always come back to this stage later if needed.

Choose different Selection Editing Tools to correct the labelled areas.

Press Continue when finished.

Adjust Horizon

The next stage is to adjust the horizon in the image by clicking and moving the mouse up and down. If there is no horizon this step can be ignored. Press Continue to move on to Enhance Image.

v3 Add & Edit Areas

Adding Areas

After opening an image you can label different areas of the image – such as Sky or Rock – by dragging the labels from the left hand side of the screen onto the image.

Editing Areas

When you have finished labeling areas, press continue and the areas you have chosen will be expanded automatically and highlighted in different colors. These areas can be edited by clicking the mouse and dragging the regions. Try it to see how this works. You don’t need to be too accurate, and you can always come back to this stage later if needed.

Choose different Selection Editing Tools to correct the labelled areas.

Press Continue when finished.

Adjust Horizon

The next stage is to adjust the horizon in the image by clicking and moving the mouse up and down. If there is no horizon this step can be ignored. Press Continue to move on to Enhance Image.

Adjusting the Selections

Once you’ve started editing, you may find you want to adjust the area selection. Simply click Add & Edit Areas in the left hand menu bar to open the labelling stage again. When you’ve finished making adjustments, click on one of the other editing headers in the menu (e.g. Water or Sky) to return to your editing.

Open An Image

The LandscapePro Home screen

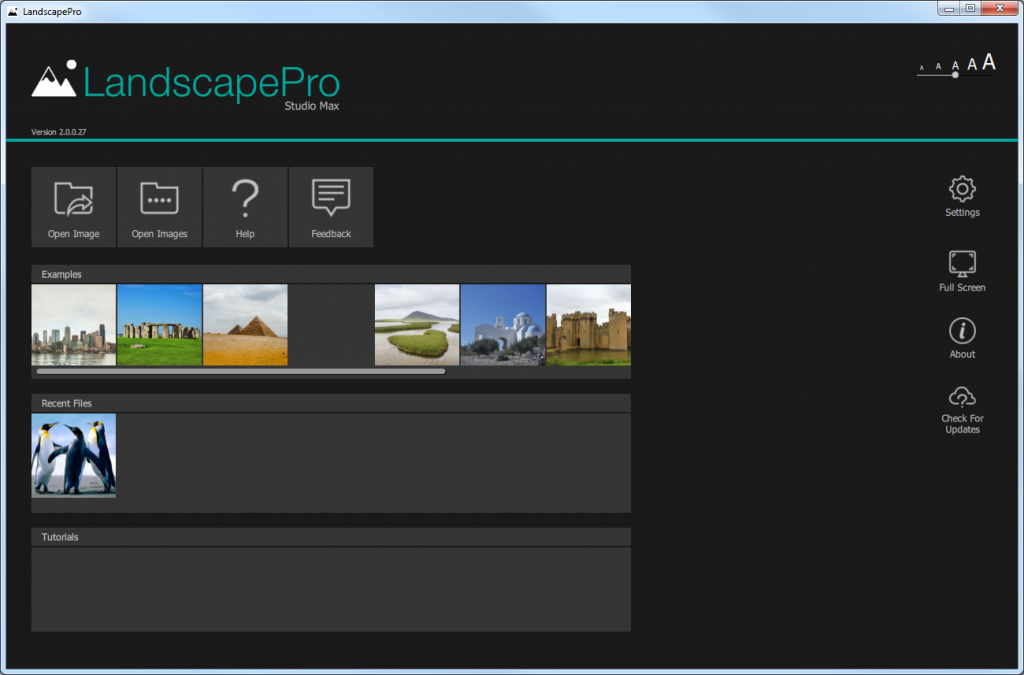
When you run LandscapePro, the first thing you see is the Home screen.

On the Home screen you will see buttons to Open an Image or a Batch (Studio Max only) and buttons to get Help or give Feedback.

Below this you will find Examples you can work with and some short Tutorial videos to watch. If you’ve already edited an image with LandscapePro 3, you’ll also see your Recent Files.

Open a single image

To begin working on a landscape image, click on the Open Image button. The Open Image window will open; browse to the image you want to work on and select it.

Image types

LandscapePro Standard supports JPEGs, and TIFFs with 8 or 16 bits per color sample (24 or 48 bits per pixel). It can load in all of these formats and will always save in 8 bits per color sample.

LandscapePro Studio and Studio Max editions also support reading most camera RAW file types. They will save tiff files with the same number of bits as the original file.